ULTRA MOUNT ENGINE MOUNT SET-UPThe Ultra Mount Engine Mount requires tightening of the assembly together before being installed in the car. The mount assembly from the factory is NOT ready for installation without the following steps.Step #1 "The Mount"The Ultra Mount Engine Mount assembly looks like this when shipped. This is also the orientation of the mount when installed in the car. 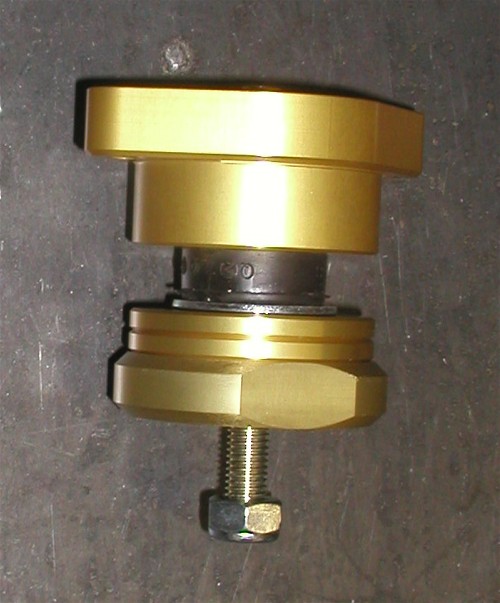 Step #2 "Shim Determination"If you plan to run the mount at stock height, you can skip this step. Each mount has two optional 5mm shims. These shims sit just above the thicker threaded collar. With both shims installed, the mount is as tall (thick) as the stock engine mount. You can either leave both shims installed, or remove one or both to lower the engine either 5 or 10mm. To remove shims, remove the lock nut (we install finger tight), then spin off or unscrew the thicker threaded collar with the two flat surfaces. Remove one or two shims depending on your set-up. 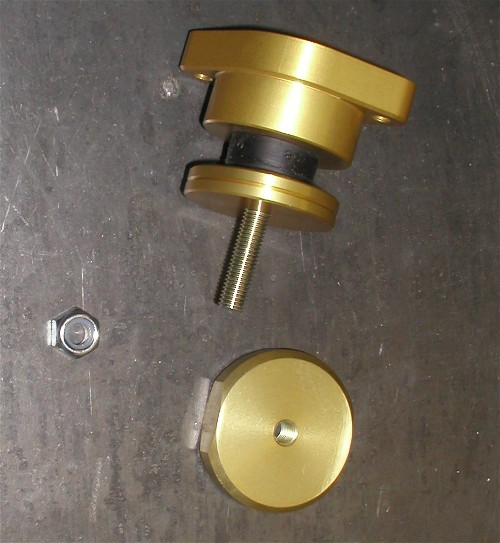 Step #3 "Ready to Tighten"For this example, we have removed one shim and left one in place. Then screw the thick threaded collar back on but don't tighten. 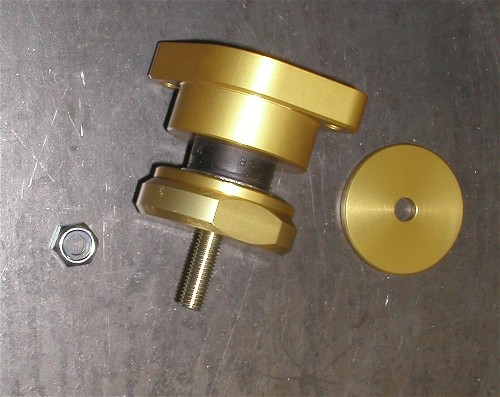 Step #4 "Setting Thread Engagement"This view shows the arrangement inside the top of the mount. It stacks up the lower half of the rubber isolator, a large fender washer, a smaller flat washer, a lock washer, then a nut. Though we show it here in a vise, the next step is easier and should be done before placing in the vise. Turn or screw the long threaded stud until you have about 1/2" or 15mm protruding up from the nut. Put a few drops of Red Loc-Tite thread locker on the exposed portion of the stud. Then turn or screw the long threaded stud back down until you have only approximately one full thread protruding up from the nut as seen here. Then while holding your index finger on the end of this nut and stud, press firmly down. With the other hand screw the thick threaded collar back up and against the shim(s). Then hold the mount body in one hand, and the threaded collar in the other and tighten by hand good and snug. Double check to make sure you still have approximately one thread sticking out of the nut. If not, adjust accordingly to achieve this. 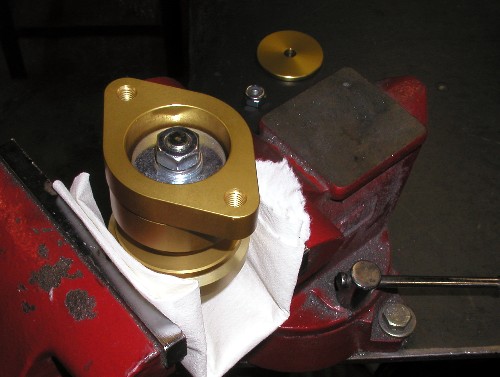 Step #5 "Final Tighten"If available, place the mount in a bench vise as seen with the vise jaws on the "flats" on the thick threaded collar. We use a cloth or soft jaws to protect the anodized finish on the threaded collar. If you don't have a vise, you will have to improvise. Last step, we need to tighten the nut. This needs to be torqued down good and tight. You will probably have two or three threads now sticking out of the nut. This is fine and a desirable depth. The mount is ready to be installed in the car. Repeat for the second mount. 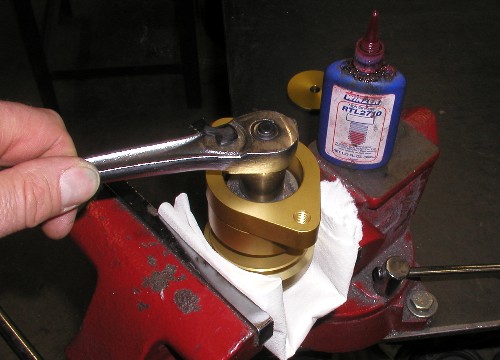
|
Secure Checkout